a

It's never too early to get some practice in for Halloween!!!

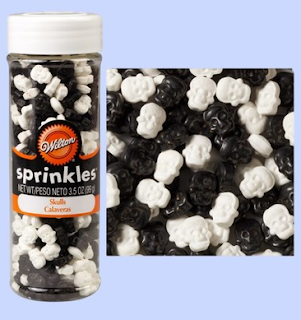
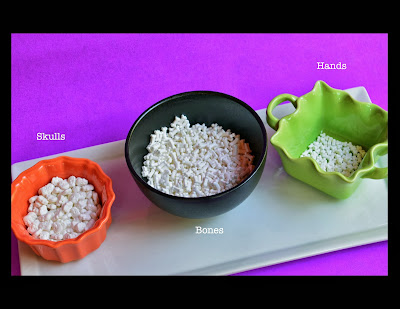
You've probably already seen these tiny bone sprinkles around for several years now. I don't recall ever seeing the skulls.
If I did, MY head wasn't in it at the time and I just walked on right by. But one day not too long ago, I was in my favorite new baking supply store and mixed in with all of the fun Halloween pans and purple/lime/orange/black sprinkles were these wee little heads. Right next to the bones which were right next to the coffin pans. Which is how it should be.
The name of the store is GYGI (pronounced, "Ghee, Ghee") and it's like a kitchen store on steroids. If you're ever in the area, you simply must plan a few hours minutes to drool. Take a cloth. It's that bad good.
On some of the packaging Wilton calls them "Jumbo" but jumbo they are not. See how little they are?
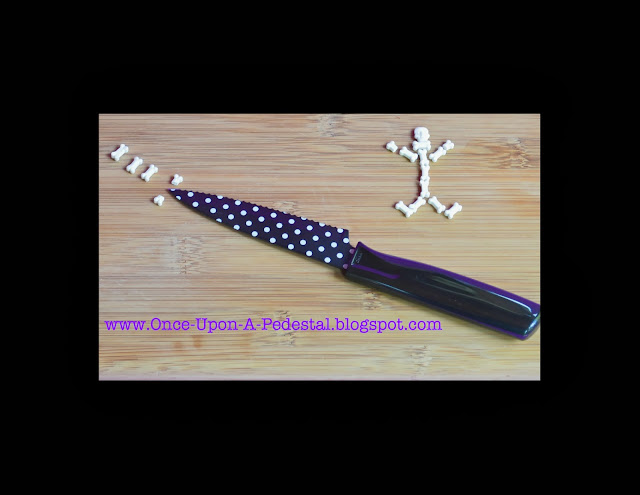
I picked up one container each of the bones and heads and home I went to play forensic anthropologist. Or something like that. No lab coat or anything. Not even an apron. Armed only with sheer guts and a small polka dot knife.
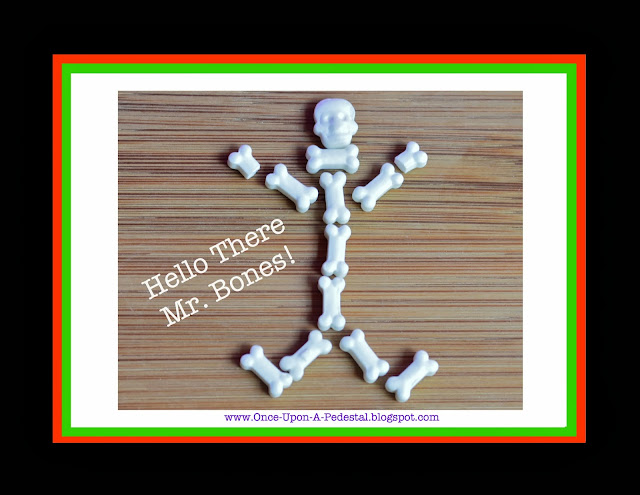
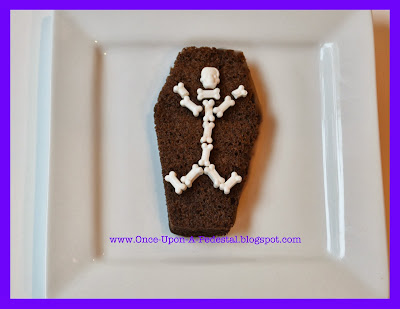
It wasn't long before I'd arranged the pieces into this cute little guy. No rib cage but he stands tall just the same. I think I was happiest with the bow tie. Until I cut a bone in half to make the hands. Ta Da! Hello there Mr. Bones!
a
a
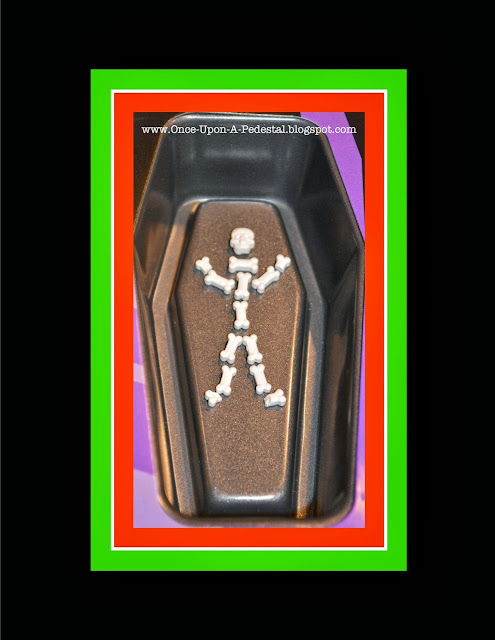
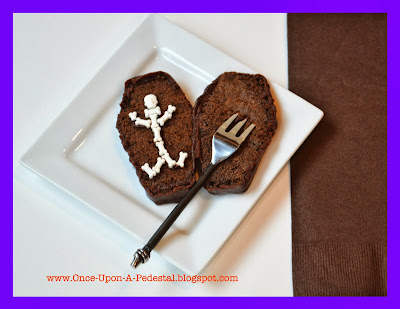
. . . but it only makes 6 treats at a time. He also needs a third bone in his spine to make him taller and more to scale. Note that he has 2 leg bones instead of one. To give him a leg up on the competition. Okay. Lame. Well he's not lame. Technically he's dead. Moving on . . .
a
a
Six treats are not a problem if you're making chocolate Rice Krispie Treats where half or more of the batter isn't setting about while you bake but not so great if you just mixed up an entire cake mix. (UPDATE: I've had pretty good luck baking the remaining batter even though it's set around a while. Cover it and pop it in the frig until you're ready to fill the pans again.) This pan would be great for a small gathering or family dessert where you only need to make six of something.
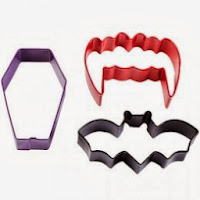
I opted for a shorter fatter coffin cookie cutter from Wiltons' Vampire set and baked the cake in thin layers in 2 jelly roll pans which gave me 21-22 treats. You could use this same idea for cookies or brownies without too many alterations.
Surprise Inside Skeletons
a
Equipment
Equipment
(2) 12 x 17 x 1 inch jellyroll pans
Paring knife
Coffin cookie cutter (3.5 inches tall x 2 inches wide at fattest point)
Paring knife
Coffin cookie cutter (3.5 inches tall x 2 inches wide at fattest point)
Baking parchment to fit jellyroll pans
Small offset spatula
Small bowl of water
Paper towels
Small art paint brush
Piping bag with #3 round tip
Cooling rack 12 x 17 for decorating
Small bowls for candy parts (optional)
Small offset spatula
Small bowl of water
Paper towels
Small art paint brush
Piping bag with #3 round tip
Cooling rack 12 x 17 for decorating
Small bowls for candy parts (optional)
Ingredients
Chocolate cake mix plus oil, water and eggs per package
(2) 16 oz cans chocolate frosting
Baking spray with flour
Wilton Bone Sprinkles (3.53 oz/100g) (21 uses slightly less than half of the container)
(2) 16 oz cans chocolate frosting
Baking spray with flour
Wilton Bone Sprinkles (3.53 oz/100g) (21 uses slightly less than half of the container)
Wilton Skull Sprinkles (3.5 oz/99g) (21 doesn't even put a noticeable dent in the container)
Optional:
Frosting, fondant, gummy worms, cookie headstones, cookie crumbs for decorating
Optional:
Frosting, fondant, gummy worms, cookie headstones, cookie crumbs for decorating
Directions
Preheat oven to 350 degrees F. Spray the pans with non-stick baking spray. Line the pans with parchment and spray a second time.
Prepare cake mix as directed on package. Divide batter evenly between the pans and smooth to a thin even layer using the offset spatula.
Bake for 6 minutes watching closely and turning pans at 3 minutes for even baking. Dampen enough paper towels to cover each pan.
Remove pans from oven and immediately press the damp paper towels on the top of each pan to flatten the layers.
Use the bottom of the pans to help level. This just takes a couple of seconds when the cakes are hot.
Set aside pans to cool completely.
While cakes are cooling, cut 21 bones in half with the paring knife.
Separate 21 white skulls from the container.
Fill the piping bag with chocolate frosting.
Invert the cooled baked layers onto clean parchment sheets. Cut 21 shapes from each layer (3 rows of 7) with the coffin cookie cutter.
Save the remaining crumbs for decorating the grave yard to look like freshly dug graves if desired.
Set the cut shapes onto parchment lined jellyroll pans and it's on to the good stuff . . .
Decorating
Trial run: place one set of the bones in place on top of one of the coffin shapes or inside the coffin cookie cutter in order to learn the spacing and angles of the bones.
Use this as your temporary pattern.
Fill a small bowl with water.
Dampen paint brush as needed and wipe excess off on paper towel to remove any frosting smudges from the bones as you work. But only if you're a bit messy like I am.
Pipe small dots of chocolate frosting onto the coffin shapes for the head and bow tie and attach them to the dots.
Pipe a small line for the center of the skeleton, about 1 1/4" long or the length of 3 bones. Attach the bones to the line.
Pipe small segments for the arms and dots for the hands and attach the bones to the dots.
Pipe an upside down "V" for the legs, starting at the center of the lowest center bone. Attach legs.
Pipe 2 segments for the feet and attach them. Legs and feet will resemble a loose "W"shape.
Repeat 20 times, leaving half of the cut coffin shapes plain to be used as the lids.
Pipe a small border around the edge of the coffin and set the lids over the assembled skeletons. Freeze until firm for decorating ease.
Place the frozen coffins on the cooling rack over the jellyroll pan to catch the excess frosting as it drips.
Heat the remaining chocolate frosting in the microwave until pourable.
Time varies by microwave but in mine the time was about 2 minutes total at 40% power, one minute at a time.
Tap the frosting bowl on the counter to remove bubbles. Spoon the frosting over the tops of the coffins and down the sides.
Repeat until a smooth finish is achieved. Reuse and reheat the frosting drippings as needed.
Transfer the coffins to their resting place and decorate the exteriors as desired.
- Use gray frosting to write funny sayings on cookie headstones
- Arrange the coffins in a graveyard setting using the leftover cake crumbs as fresh dirt
- Add gummy worms, bats, spiders, ghosts, witches and cats to dress up the scene
- Use fondant or modeling chocolate and the coffin cookie cutter to cut lids for the coffins
and cut strips to form the sides for a more finished look
Some funny headstone ideas I found online:
Theo Later
U.R. Gone
I.M. Goner
Ray N. Carnation
Dustin T. Dust
Lev Itation
G.I. Miss You
Trudy Departed
Rust N. Peace
Rest N. Pieces
I.L. Beback
M.T. Tomb
Underneath Lies Mr. Jones, Sadly now a bag of bones
Happy Haunting!!!


